Requirement:
A XYZ company is an Accounting firm which manages many clients (Account). Currently, all the files or attachments of all the accounts are stored in Salesforce and accounting person manually download the files/attachments and upload them on dropbox Account.
- Is there a way to manually sync few selected files or attachments from Salesforce to dropbox?
- Can we access the dropbox files directly in Salesforce without logging into dropbox account once the files are synced?
Solution:
As Files or Attachments of any object’s record can be “Manually-Synced” to “dropbox” account, so we need to perform below steps to perform “Manual-Sync” functionality using File ZIPO:
Step 1: Add or Configure a new dropbox Account in File ZIPO
Step 2: Define the objects & folder which needs to be Synced across Salesforce &dropbox
Step 3: Manually Sync files or attachment from the File ZIPO UI
Step 4: Add the FileZIPO Sync Component on the Object’s record page to access Sync records
(Note: Please skip step 1, if you already have a dropbox Account added in File ZIPO)
(Note: Please skip step 2, if you already have a Sync & folder defined for an Object)
(Note: User can skip the step 4, if the File ZIPO Sync Component is already added on object’s layout)
Let’s go through all the above steps one by one to Configure Manual-Sync using File ZIPO.
Step 1:
User can easily add any dropbox account in few simple steps. Please refer this detailed blog to add a dropbox Account in File ZIPO
https://www.filezipo.io/how-to-add-a-new-dropbox-account-in-the-file-zipo/
Step 2:
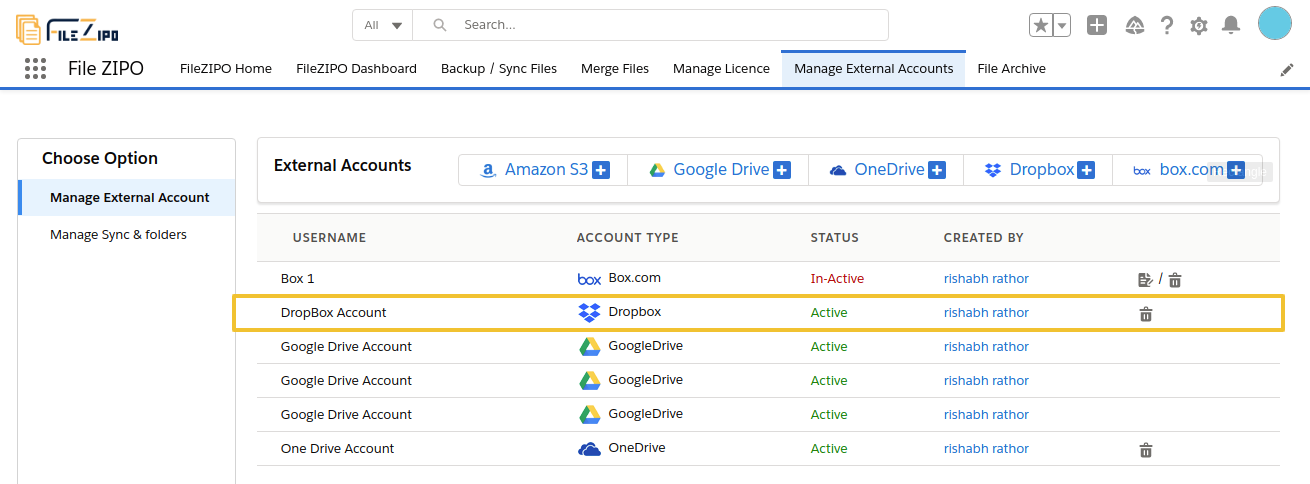
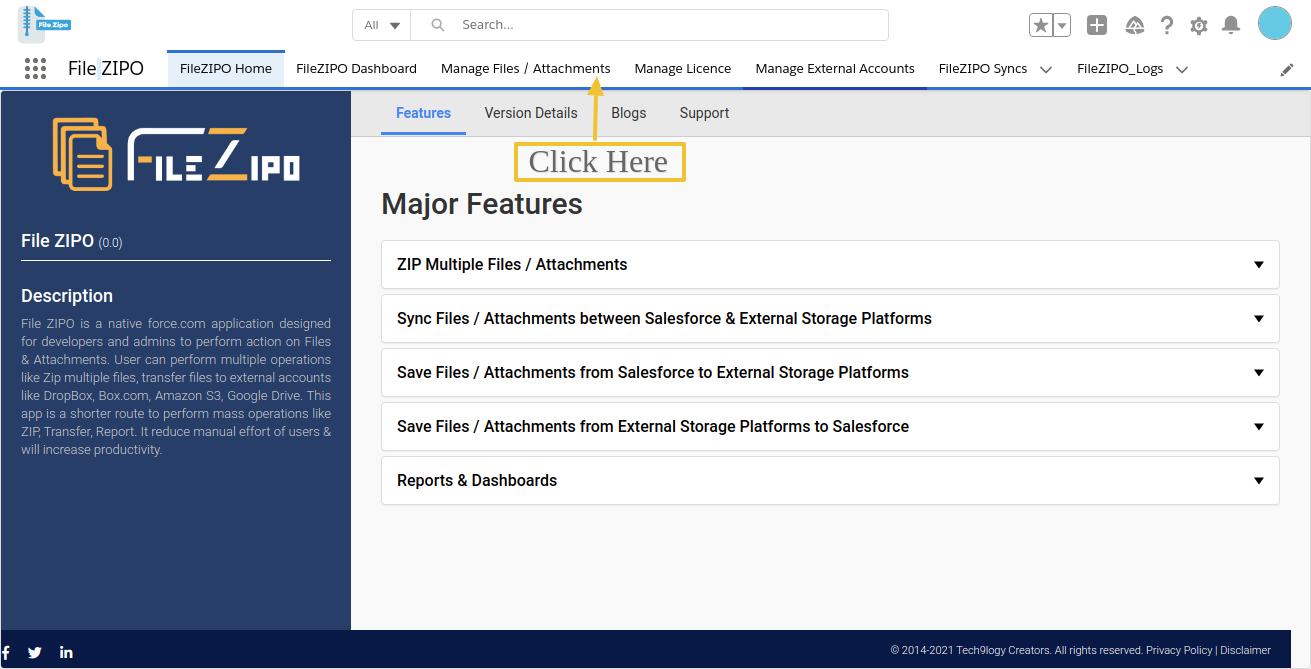
Once the “DropBox” account is added in File ZIPO “Manage External Accounts” tab, then click on the “Manual Sync & Folders” on the same page to configure the Objects on which “Sync” needs to be enabled.
(Note: Please skip step 2, if you already have a Sync & folder defined for an Object)
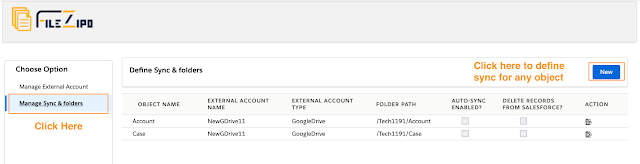
Click “New” button on the “Define Sync & Folders table”. Once clicked, it will display a popup.
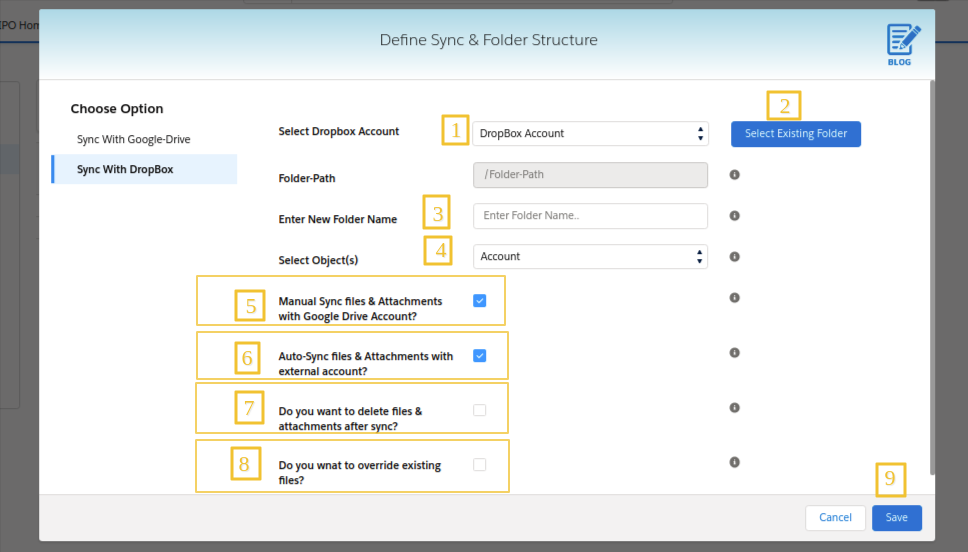
Above image has some features (each number has its description as below):
- Select the DropBox Account which needs to used for Sync”
- Select the Folder path on existing DropBox account (or can create new using step 3)
- Enter the name of the Folder in which Files or Attachment will be saved
- Select Single or Multiple Object for which sync needs to be enabled
- Enable or Disable this checkbox in order to prevent manual Sync.
- Enable or Disable this checkbox in order to prevent Auto-Sync.
- If user wants to delete the file or attachment from Salesforce when it is successfully synced,
just check this checkbox. - Enable or Disable this checkbox in order to prevent override existing files.
- Once all the above configurations are ready, click on “Save Folder” to define the Object and its folder structure.
Step 3: Click on “Backup / Sync Files” tab
It will open screen like below Image
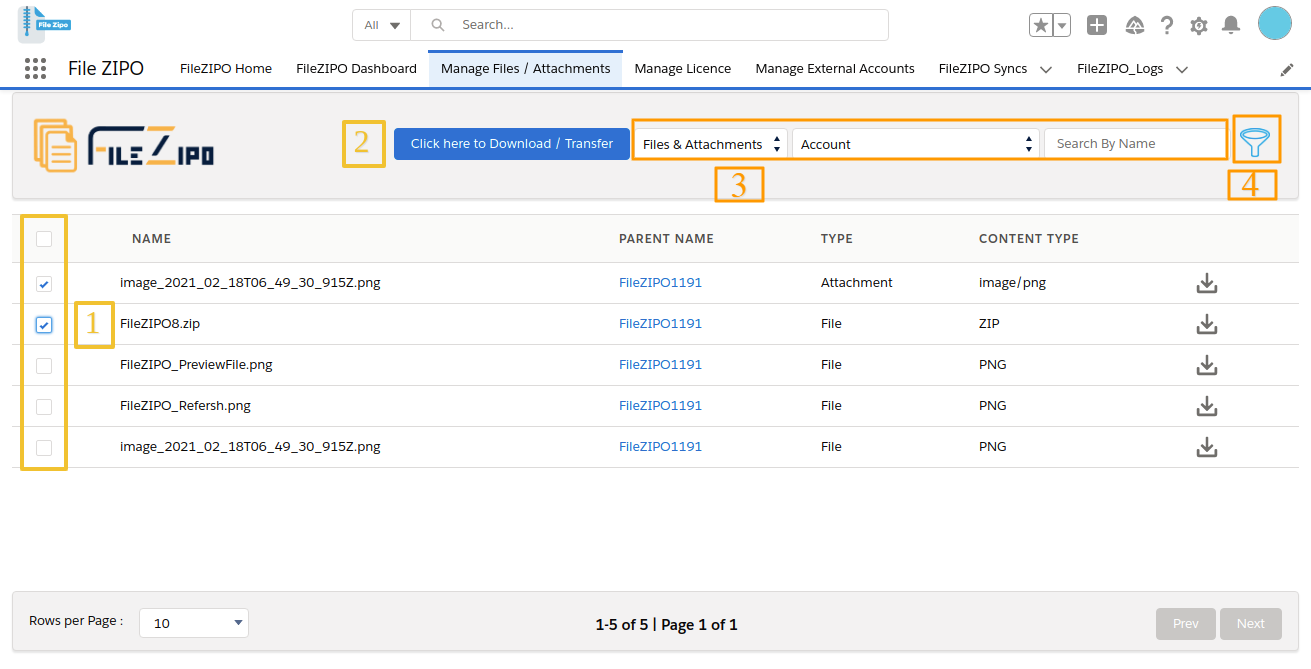
Above image has some features (each number has its description as below):
- Select single or multiple Files / Attachments.
- Click on “Click Here to Download/Transfer” button.
- User can use multiple Filters like dropdown by Selecting “Files & Attachments” or “Only Files” or “Only Attachments”, by Objects and by File / Attachments Name.
- User can use “Advance filter” by clicking on Filter Icon.
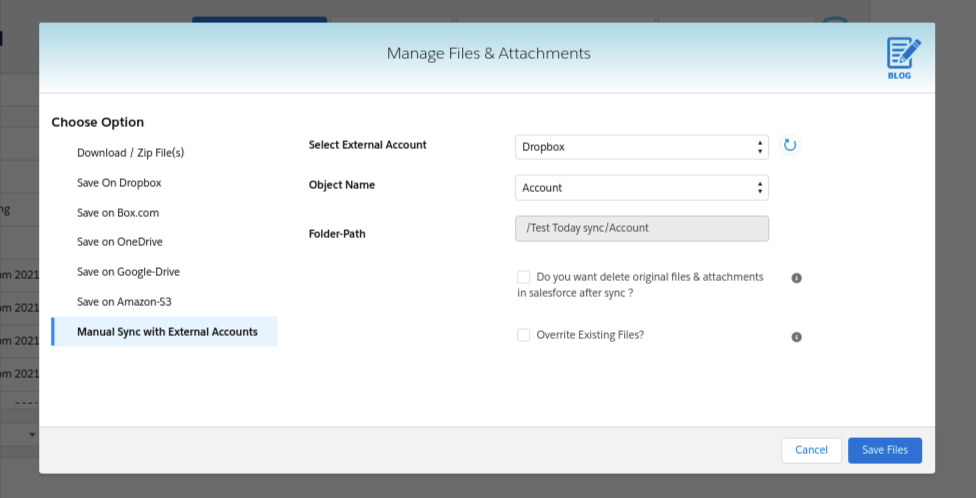
Once files/attachments are filtered, select your files and Click on “Click Here to Continue” button. Once clicked, it will open a popup as below:
Step 4:
Need to Add the FileZIPO Sync Component on the Object’s record page to access Sync records. In order to add the FileZIPO component on the Detail page of the record as the first step.
(Note: User can skip the below steps (1 to 5), if the File ZIPO Sync Component is already added on object’s layout)
Few Simple Steps to add File ZIPO Sync Component on Record Page:
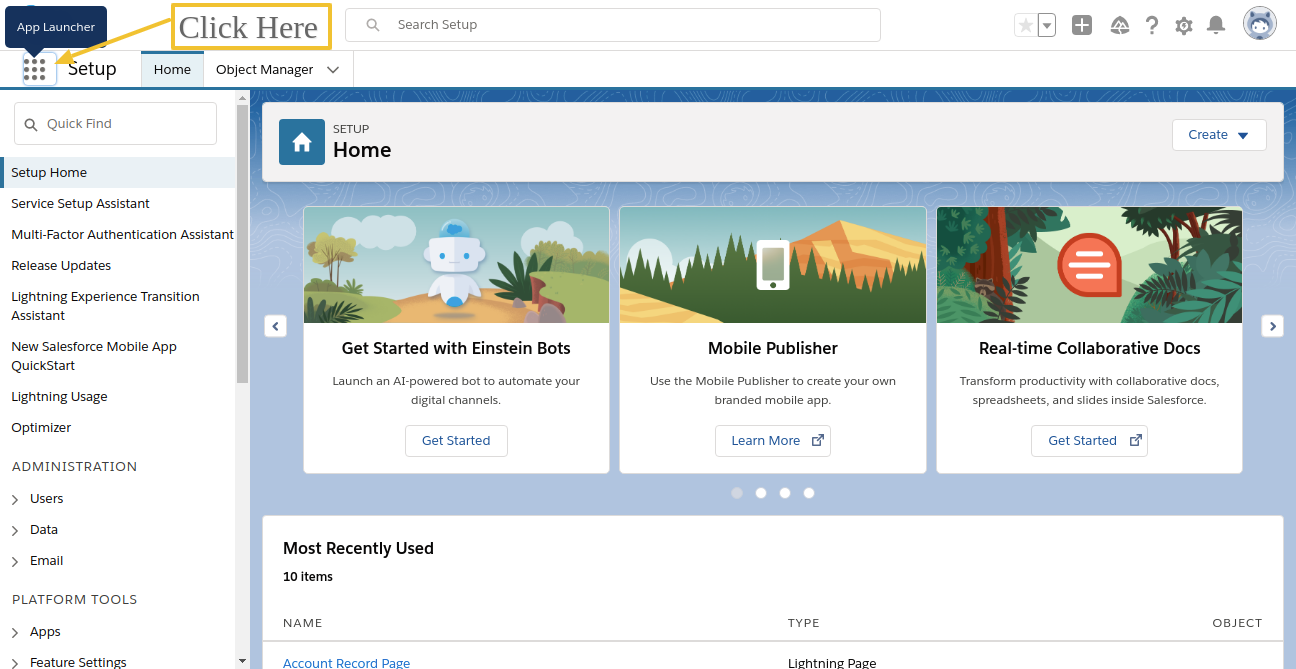
Step 1. Go to App Launcher like below image.
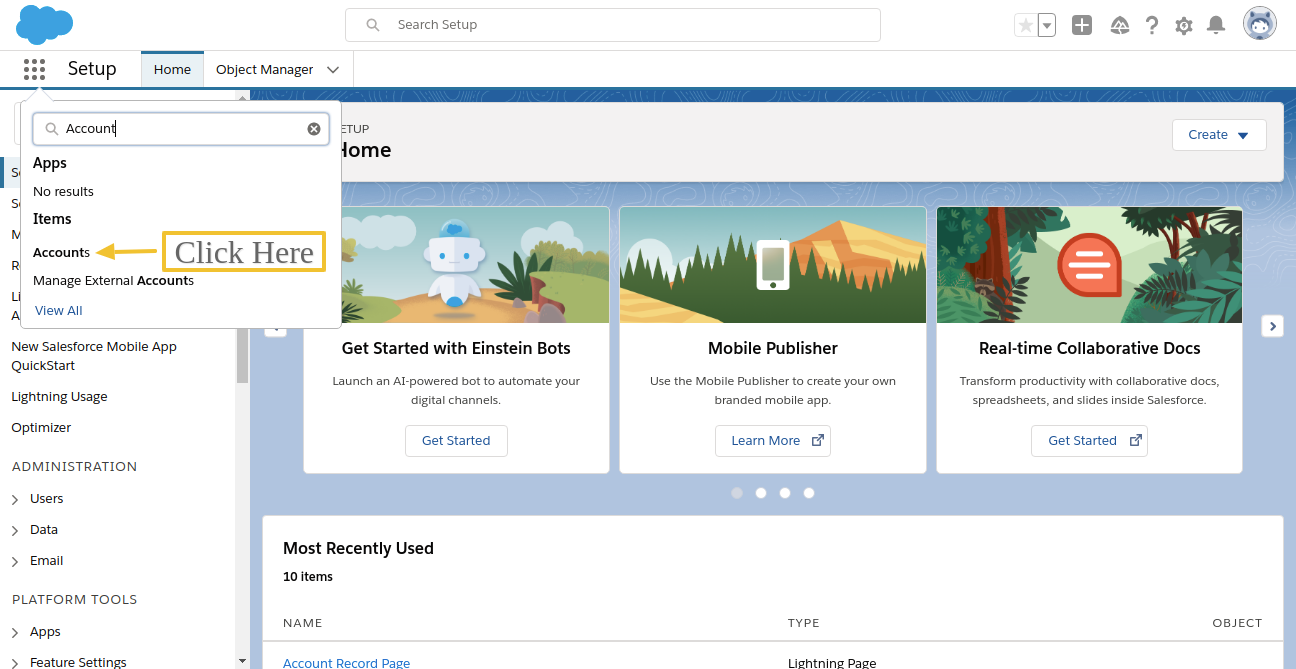
Step 2. Search any Standard or Custom object and click on the searched object. (Account object in this example).
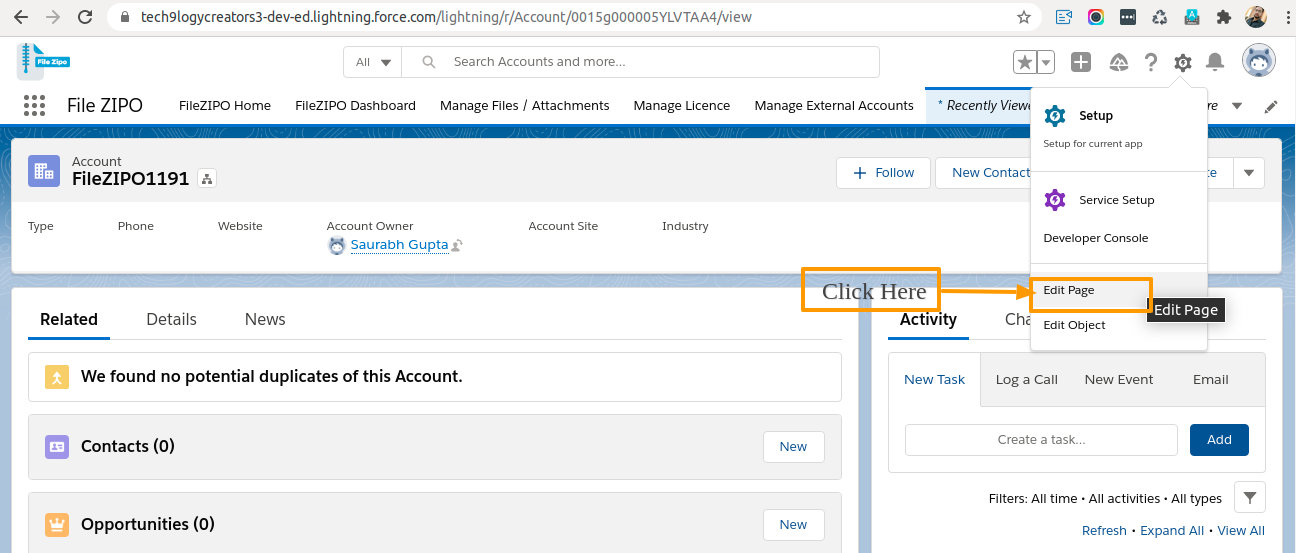
Step 3. Go to object record page by clicking on any record and Click on the Gear Icon on the top right corner and click on “Edit Page”.
Step 4. Once “Edit Page” is clicked, it will open the App Builder page.
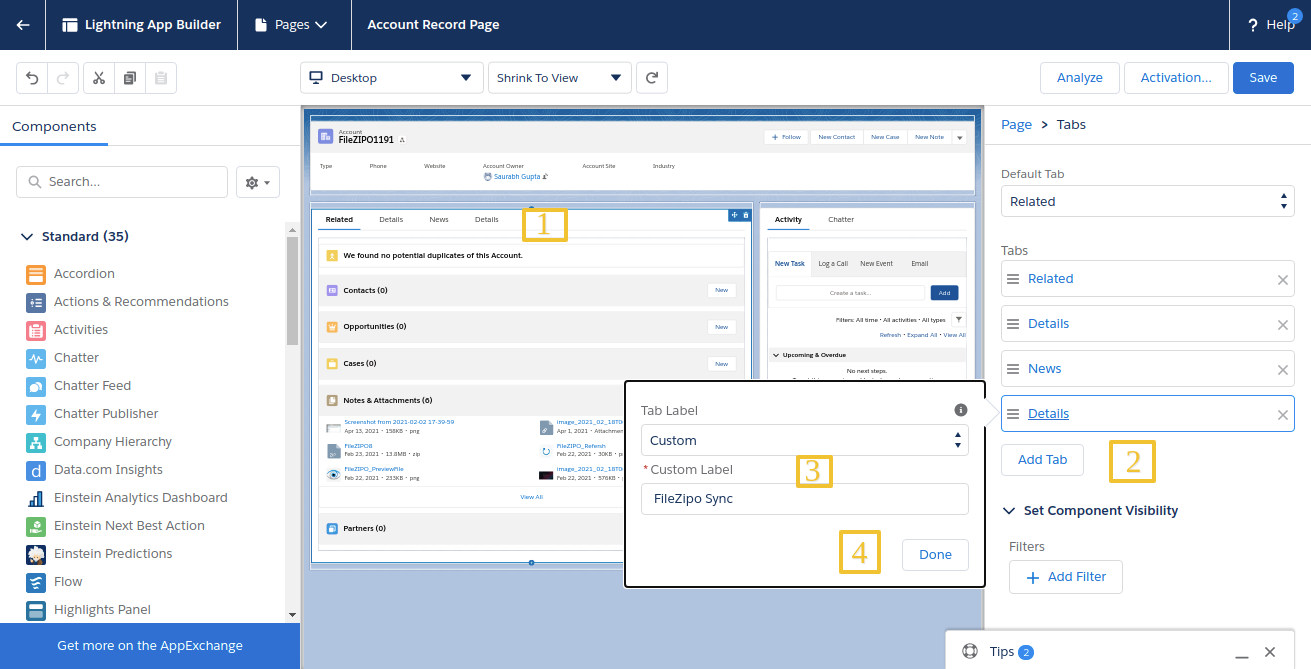
Above image has some features (each number has its description as below):
- Click on Tab section.
- Click on “Add Tab” button.
- Choose Tab label as “Custom” and enter name in “Custom label” as “File ZIPO Sync”
- Click on “Done” Button to add tab.
Step 5. After adding tab, select the below component & drag the component to the newly added tab like below image.
Name of Component: FileZIPO_ManageExternalFiles
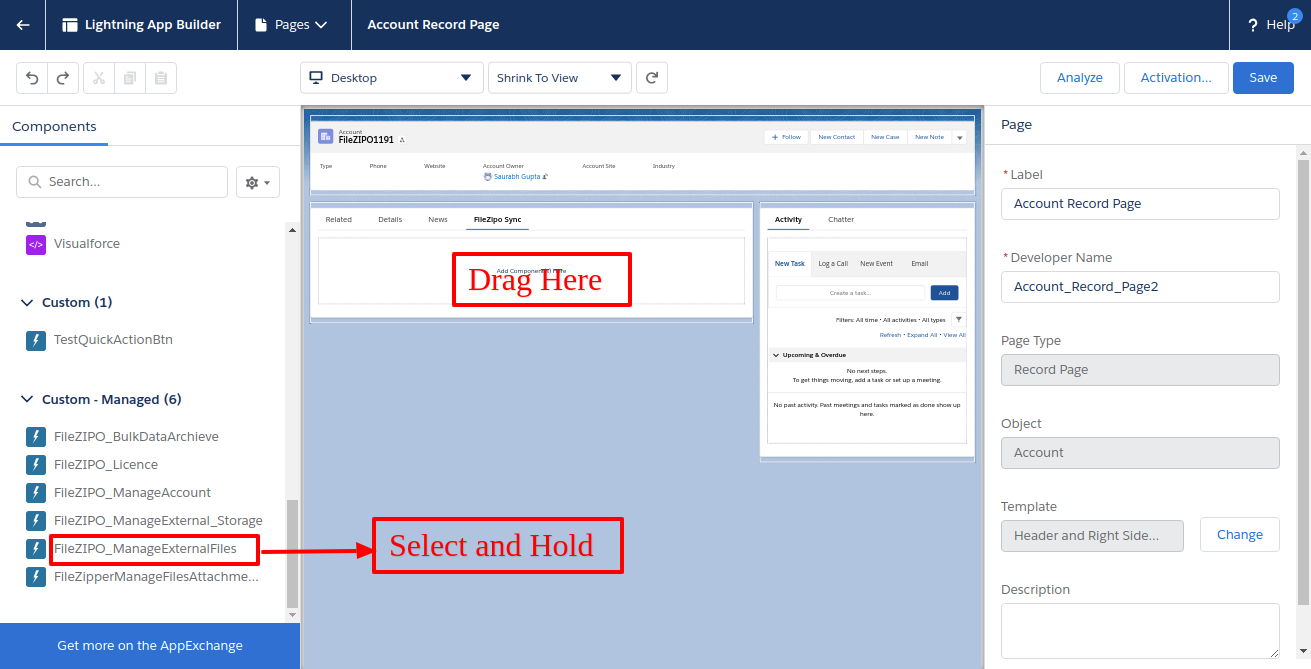
Click on Save and then Activate Button to add tab on detail page.
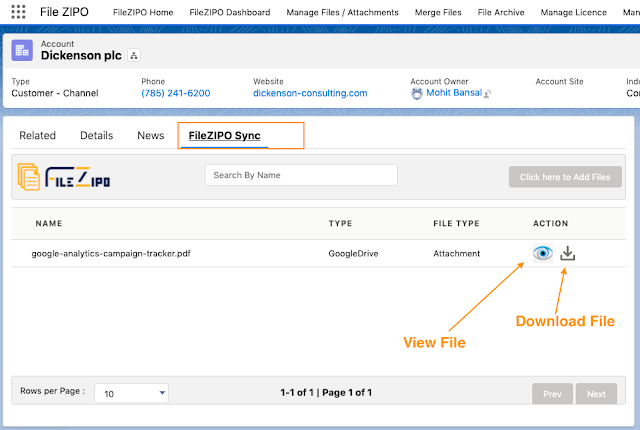
Step 6. To Check if the Files / Attachments are Sync with DropBox or not, just go to you Object record page and upload any file or attachment (manually in Salesforce)
Now click on File Zipo Sync Tab, you will see your file will be automatically added to DropBox and it will create a Sync record.
User can easily access the file (from Salesforce) by clicking on “Eye” or “Download” icon.
***************************************************************************************************
Have you started using FileZIPO yet? Get this revolutionary application and make your Salesforce file storage effortless and pocket-friendly. Click here to install the latest version of FileZIPO application in your Salesforce instance & explore its complete benefits for you.
For any queries or suggestions, you can contact us at https://filezipo.io/#contact or mail us: support@ayansoftwares.com. Our File ZIPO Expert will help you get the best out of it.
We appreciate your valuable inputs.
This tool is available on Appexchange and Click on below button to install the
latest version of File ZIPO
Our other Salesforce Product